


In recent times I was looking to change up a little bit and test my coding ability with another Node.js framework that is not Express, I have always used Express.js in many of my projects, in my search, I discovered Hapi.js and I am loving it already currently using it in one of my projects, one thing I noticed is that most of the article, tutorials or blogpost on Hapi are outdated because I remembered how I struggle with some implementations it was only after I read the docs thoroughly I was then able to solve my problem.
Hapi is a Node.js framework use in creating server-side web applications, it was "originally developed to handle Walmart’s Black Friday scale, Hapi continues to be the proven choice for enterprise-grade backend needs", Hapi is known for its simplicity and security, and satisfaction. Hapi is very secured due to the fact that all the dependencies that can be used with Hapi are all from Hapi's own verified contributors.
Hapi.js and Express.js have one thing in common and that is been very easy to set up, in less than ten minutes or less you are already running on the Hapi server, and migrating to Hapi from Express is very easy.
In this tutorial, we are going to learn some basic Hapi concept and techniques and these are categorized as the following;
- Hapi setup
- Creating a basic server
- Adding routes
- Plugins
- Serving static files
Prerequisites
Basic knowledge of Node.js and JavaScript is required. Basic knowledge of how to use the terminal.
The setup
Firstly, we'll create a folder to hold our project files together after which we will then initialize NPM to create a package.json file and then we can start installing our dependencies, I will be using yarn as my package manager, if you don't know what Yarn is, it's an alternative to npm package manager, instead of installing packages with npm install, it will be yarn add. You can read more about Yarn here, it is pretty easy to use.
Head up to your terminal, in your navigate to your projects folder,
mkdir hapi_project to create a hapi_project folder, cd hapi_project to navigate to the new folder then yarn init -y to initializes a new package manager and create a package.json file in the project folder.
Next up, we are going to install the dependencies we'll be needing for this tutorial.
yarn add @hapi/hapi @hapi/inert --save
The command above install the necessary dependencies needed for our project, @ hapi/hapi is the main Hapi dependency, and @hapi/inert is for serving static files
Setting up Hapi Server
We will start by creating a server and this server will only return the "Hello World" text.
First, create a server.js file in your project folder, copy and paste (I recommend you type them) the content below into the server.js file
  const Hapi = require("@hapi/hapi");
  const Port = process.env.PORT || 3000;

  //create a server config

  const server = Hapi.server({
    host: "localhost",
    port: Port,
  });


//other logic here


   const config = async () => {
    await server.start();
     console.log("Server listening on port ", server.info.uri);
   };

//start the server
   config()

// handling unhandledRejection Error
process.on("unhandledRejection", (err) => {
  console.log(err);
  process.exit(1);
});
In the first line, we require the Hapi dependency and also set the port on which our server will be listening on to the Port variable. In the next line, we created the server which takes in an object where we passed in our port and host, the config function whenever its called will run our server on the port:3000. The last line basically handles an unhandledRejection error and only gets called whenever the system detects one and also automatically quits the process.
Adding Routes
Adding routes to our Hapi app is pretty straight forward
server.route({
  method: "GET",
  path: "/",
  handler: (request, h) => {
    return "hello world";
  },
});
The server function has a route properties which take in an object or array of an object or we can get more sophisticated and create another file which exports an array of object and then uses it as a route, these objects have three important properties which includes; method which denote the type of request we are making to the route, it can either be a GET, POST,PUT, and a DELETE request, the path property signifies the endpoints and a handler method. The handler is where we handle the main business logic that is, the incoming request and the response we are sending back to the user. The handler method takes in two arguments the request and h keyword respectively you can name them anything you want but I like to leave it like that to avoid getting myself confused, the request object contains some handful of properties, for instance, when you submit a form data to the server you can access it with request.payload, the data are available in the payload property of the request object and let's say you have parameters or queries available in your URL you can do
// for parameters in the URL

request.params

// for queries in the URL

request.query
There are also lots more you can do with the request objects. The h object also contains some handful of response toolkit, for instance, you can return a view with the h.view() or a static file with the h.file() method, most importantly a handler method must return a value, promise, or an error using the return keyword. In the example above we only return and "Hello World" text,

We can also pass parameters to routes http://localhost:3000/dellyson we can grab the value of this parameter on the server with request.params like so
 server.route({
    method: "GET",
    path: "/{name}",
    handler: (request, h) => {
      return request.params.name;
    },
  });
You can as well pass in a query to your routes http://localhost:3000?name=dellyson&age=20 we can grab the values from queries like so on the server
server.route({
    method: "GET",
    path: "/re",
    handler: (request, h) => {
      const name = request.query.name;
      const age = request.query.age
    return {
             name, age
      }

    },
  });
The above snippet returns a JSON response.

Registering plugins
In Hapi, we have what we call plugins, you can think of plugins as express middlewares which we can use to handle some functions in our project but in Hapi we use plugins before you can use a plugin, you have to register it using server.register(pluginName).
Serving static files
Serving static files is an important aspect in building our application, the only thing our server can return now is a text, if we try to return an HTML file we will definitely get an error, serving static files is not built into the core Hapi framework luckily we have a plugin for that @hapi/inert, inert brings the power of serving static files to Hapi, we have to register inert before we can use it in our code.
Before diving into how to serve static files, let's alter our project structure a little bit:
Hapi_Project
|__ node_modules
|__ server.js
|__public
|  |__ index.html
|  |__ style.css
|  |__ main.js
|__ package.json
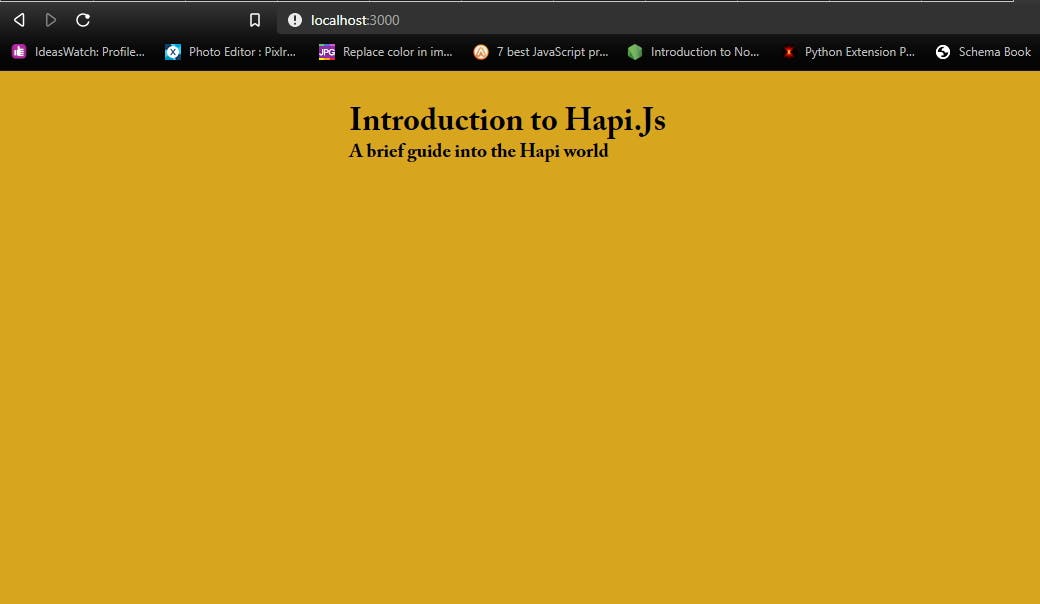
copy and paste this content into your index.html file
<!DOCTYPE html>
<html lang="en">
  <head>
    <meta charset="UTF-8" />
    <meta name="viewport" content="width=device-width, initial-scale=1.0" />
    <link rel="stylesheet" href="./style.css" />
    <title>Intro - Hapi</title>
  </head>
  <body>
    <div class="container">
      <h1>Introduction to Hapi.Js</h1>
      <h3>A brief guide into the Hapi world</h3>
    </div>

    <script src="./main.js"></script>
  </body>
</html>
Also in your style.css file
* {
  margin: 0;
  padding: 0;
}

body {
  background-color: goldenrod;
}
.container {
  max-width: 56rem;
  margin: 2rem auto;
}
We'll leave our main.js empty for now.
Let us modify our server.js file. First, require @hapi/inert.
const Inert = require("@hapi/inert")
const server = Hapi.server({
  port: Port,
  host: "localhost",
  routes: {
    files: {
      relativeTo: Path.join(__dirname, "public"),
    },
  },
});
Take note of how I added a routes property to the Hapi.server() config what this does is that the routes property also takes in another property files, this files has its own property called relativeTo what this does is that it takes in the relative path to the directory that contains our static files. Note, this path will be relative, in this project, the folder containing all my static file is the public folder which is the reason why I set the value to Path.join(__dirname, "public"),. Path is a Node.js module
inside the config function before the server.start(),
await server.register(Inert)
Now we can add the route we want the server to serve the static file from
 // static file route
  server.route({
    method: "GET",
    path: "/{params*}",
    handler: {
      directory: {
        path: ".",
      },
    },
  });
What the snippet above does is basically search for the public directly on every route and the directly passed into the handler method basically refers to the public directory, this is where the Inert plugin looks for files to serve. If you omit the await server.register(Inert) line, you will get an unknown handler: directory in the console.
Now, let's modify our home route to render our HTML file.
server.route({
    method: "GET",
    path: "/",
    handler: (request, h) => {
      return h.file("./index.html");
    },
  });
Putting it all together
const Hapi = require("@hapi/hapi");
const Port = process.env.PORT || 3000;
const Inert = require("@hapi/inert");
const Path = require("path");
// create a server config
const server = Hapi.server({
  host: "localhost",
  port: Port,
  routes: {
    files: {
      relativeTo: Path.join(__dirname, "public"),
    },
  },
});

const config = async () => {
  await server.register(Inert);
   // static file route
  server.route({
    method: "GET",
    path: "/{params*}",
    handler: {
      directory: {
        path: ".",
      },
    },
  });
  server.route([
    {
      method: "GET",
      path: "/",
      handler: (request, h) => {
        return h.file("index.html");
      },
    },

    {
      method: "GET",
      path: "/re",
      handler: (request, h) => {
        const name = request.query.name;
        const age = request.query.age;
        return {
          name,
          age,
        };
      },
    },
  ]);

  await server.start();
  console.log("Server listening on port ", server.info.uri);
};
config();
// handling unhandledRejection Error
process.on("unhandledRejection", (err) => {
  console.log(err);
  process.exit(1);
});
Wrap up
There are many more things you can do with Hapi.js you are not just limited to the ones I have shown you, you can head over to Hapi website. Find the link to the project repo below. See you in my next post. Peace ✌. Repo link